How To Take Pictures In Infrared
 Our eyes see the world, of course, in visible light, but there are other
kinds of light. There's ultraviolet light. There's also infrared light. If you
have an infrared filter on your lens, you can photograph the world in infrared
light which yields a very different result than normal visible light. Our eyes see the world, of course, in visible light, but there are other
kinds of light. There's ultraviolet light. There's also infrared light. If you
have an infrared filter on your lens, you can photograph the world in infrared
light which yields a very different result than normal visible light.
Most infrared photographs are black and white, although it is possible to do
color infrared. Typically, what you get is a dramatic change in vegetation,
especially with the sky and it's possible that you can get a difference in skin
tone. But doing infrared portraits with a digital camera is actually somewhat
difficult.
Most Camera’s Cut Out Infrared
Sitting in front of the image sensor of your camera, there is a filter that
serves a lot of functions. And one of the things it does is it cuts out infrared
light. So, by default, your digital camera is not necessarily super sensitive to
infrared light. You can get an idea of how sensitive it is by putting the camera
in bold mode, opening the shutter, and shining your TV remote, or something else
that's infrared. If you see the little light bulb at the end light up, then your
camera is able to perceive infrared.
You also need a filter to go on your lens, and there are a lot of
different kinds of filters.
The most popular is the Kodak Wratten 87 series of filters. There are different
variations with different densities. Which one is right depends partly on the
look you are going for and partly on the infrared sensitivity of your camera.
The problem is these filters are very expensive, particularly if you need
a large filter size.
And some cameras are more sensitive to infrared light than others. So, before
you commit to this idea, before you go out and buy the pricey filter, you really
ought to do some searching on the web for your specific camera model, and
infrared filter to find out what people are saying about your camera's infrared
sensitivity.
If you see indications that your camera is a good candidate for infrared
shooting, then by all means go ahead and get yourself a filter and find yourself
some subject matter that seems like it will lend itself to infrared shooting.
Objects Vary With Infrared
Different kinds of vegetation responds differently to infrared, vegetation
usually turns white. I know palm trees do a good job. It also helps to really
have some direct sunlight on them.
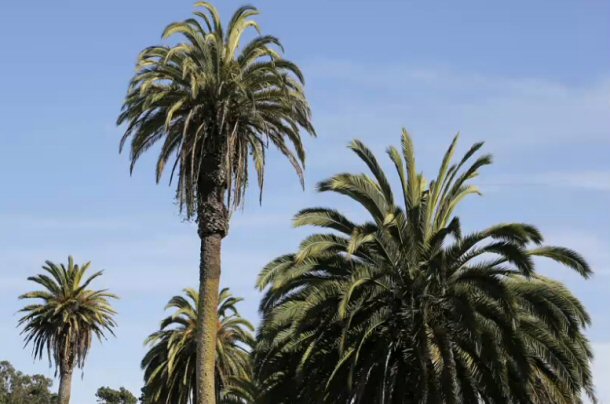
So I have framed up a shot, and I have done this just like I would frame up
any shot. I am going to show you what I have got. I do not have an infrared
filter on the camera right now. I have simply set my camera to aperture
priority. I am at f/11 because I want to ensure some deep depth of field. And if
I take this, so here's what we get.
It's not the most captivating image. It's a simple still life made out of
some palm trees, but once we get into the infrared, it's going to become much
more interesting.
Getting To Infrared
Now, to get it into infrared, I need to get my infrared filter on the front of
the lens. But before I do that, there are some things to consider. My infrared
filter is extremely dense. It's going to cut 8 to 10 stops of exposure from my
scene. That means my viewfinder is going to be useless once I put this filter
in, I am not going to be able to see through it and neither is the autofocus
system in my camera. It's going to go blind because it's basically just going to
be looking into the dark.
So, I need to make sure that my image is composed and focused before I put
the filter on. It's already composed. I have not changed anything since I took
the last shot. It's also still focused because I haven't changed anything.
However, if your shutter button is your autofocus button, then when you go to
press the shutter button to take your next shot, the camera is going to refocus.
If your focus points end up focusing on the sky, your image is going to go
out of focus. So you have a few options.
Tips For Staying Focused
One, if your camera allows it, you can take autofocus off of the shutter button.
For example, I have my camera set up so my back button auto focuses, so I can
press the shutter button without worrying about it refocusing. Another thing you
can do is once the image is focused, simply switch your camera from autofocus to
manual focus. Now, the autofocus mechanism is disabled, so my focus is locked
in.
So I have got my shot composed, I have got it focused. I can't tell anything
about exposure until I get the filter on. So I am going to do that next. So I am
taking the filter, and I am just screwing it onto the front of the lens. I am
being careful for two reasons; I don't want to change my shot. I don't want to
bump the camera such that it will move around and recompose my shot because once
these are on there, I can't see, so I would have to take them off and start all
over.
Also, these are 77 millimeters filters, 77 millimeters in diameter. They are
big enough that screwing them on straight can be a little complicated. So, I am
trying to be careful with that, because if I get them screwed on crooked, they
are going to be very difficult to remove. .
So I am framed, I am focused, I have the infrared filter on. On my particular
camera, metering at this point is useless. The camera is going to meter
completely incorrectly.
If I hit my metering button, it's telling me f/11 at an eighth of a second.
If I take this picture, it's just going to be black. So, the meter has gotten it
totally wrong. I have to go to a completely manual mode here. I am going to
switch my shooting mode over to manual.
Now, when I took this shot before, I shot it at f/11 to try to guarantee deep
depth of field.
I could continue to do that except that it's going to require a very, very
long shutter speed.
Experimenting With Speeds
I am going to dial into 8 seconds just from my own experience, I know that an
infrared image at ISO 3200, which is where I am at right now, is going to need
at least 8 seconds.
So I am going to take that shot and see what happens.
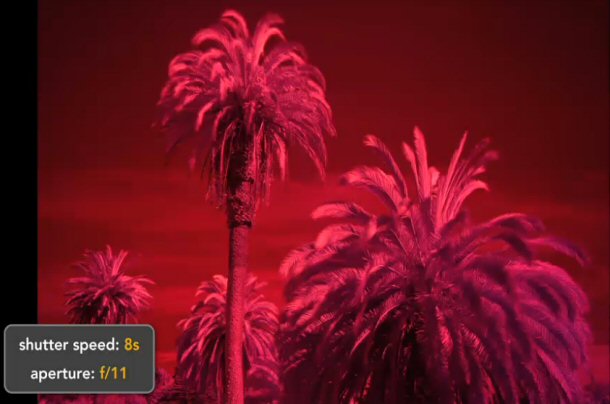
As I watch during
these 8 seconds, I realize that the trees are blowing around. That might be kind
of a cool looking effect. We will explore that as we test different shutter
speeds. Also it is apparent that the picture is a little bit dark.
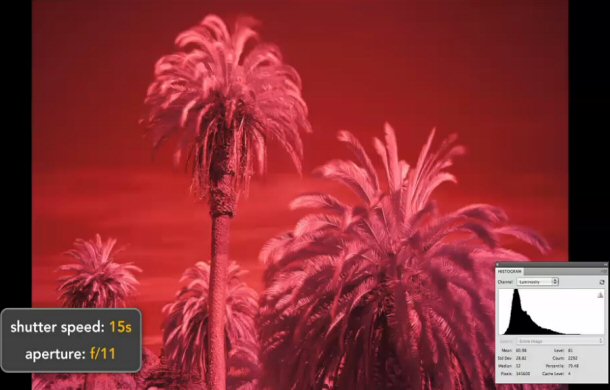
Now I am going to go up another step. So I am going to go to 15 seconds which is
going to brighten things up a little bit. Your histogram is critical at this
point when you are feeling around for your exposure because it's going to tell
you whether you have actually got things bright enough or not. .
So, I am going to do a 15-second exposure. The tree branches are going to be
very, very blurry. I might decide I like that. I think in this case, I want some
of them to be as sharp as possible. I think 15 seconds is right at f/11. But it
also means that the tree branches, as you can see, here are pretty smeary.
I actually like the look, but I would also like to try it with tree branches
that aren't quite so over rot with motion blur.
So I am going to open my aperture up some. I am at 15 seconds right now at
f/11. If I go to f/8, that will get me down to 8 seconds. I could go down
another stop. I am going to go down to f/5.6. That will get me down to 4
seconds. So let's see what that looks like.
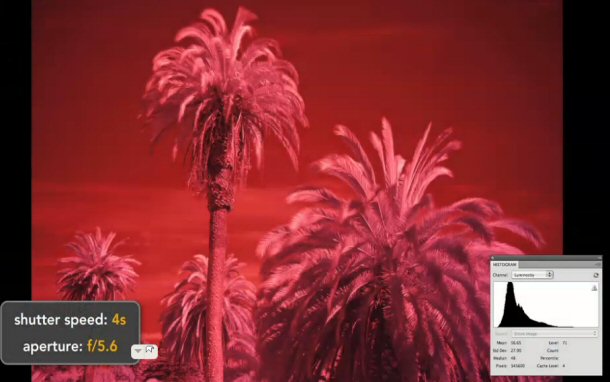
I like this better. The branches are not as smeary, and I think the exposure
is good.
Shutter Speeds And Brackets
Now, on my camera, I know that ISO 3200 is a usable ISO. It does not yield an
image that's too noisy. Your camera may not be capable of shooting so fast, or
it might be able to go faster. If you can go faster, that's great. You can use
even quicker shutter speeds, but if you have to go to a lower ISO, then your
shutter speeds are going to get longer.
So, I think this is the shot. I might bracket it a little bit. So by bracket
it, I mean shoot it with a couple of different exposures. I think I will go for
a longer one. I am going to go up half a stop to six seconds. A stop, of course
is a doubling. If I am at four seconds, I can go up half a stop by going to six,
leaving my aperture the same. I don't really want to go any wider because I like
to keep the depth of field I have.
These images all look really red, because I am shooting through a red filter.
This is not my final image. There's still lots of processing that has to be
done.
This is the infrared shooting process. It is obviously a handful. There's a
lot you have to do here. You've got to have the special filter. Also, you can
only shoot with very long shutter speeds there. There is no situation where my
shutter speed is going to go down below 4 or 5 seconds.
Getting Your Camera Altered
That makes it troublesome for shooting landscapes because things blow around,
makes it hard to do portraits because it's hard for people to hold still for
that long. If you're really in to infrared and you would like a more capable
infrared digital camera, you can have your camera altered.
You can have that filter that sits in front of the image sensor removed, and
you will find that your shutter speeds go way up and your infrareds go much
faster. Your infrared sensitivity increases a lot, but it permanently alters
your camera. Without that filter, you can see some variety of different
artefacts when you are shooting normally. You might see weird patterns; you
might see weird color shifts.
Photography
Taking Pictures With 24mm (or less) Lenses
How To Get A Wider View With Fisheye Lenses
How To Take Pictures In Infrared
8 Photographic Compositions an Amateur Can Try
Beginners’ Guide to Taking Photos |